
Select your fruit & recipe:
You want fruit to be RIPE, even slightly bruised is OK. Almost falling apart because it is so ripe - if NOT rotten or fermenting - is great! Pick it on the day of canning, or store it overnight at room temp to use in am, or in fridge for a couple days to use later. You DO NOT have to pit the fruit first, if the pits are not free-stone and easy to remove. You can par-boil the fruit with the sugar, and run it through a sieve colander with a "reamer" (? I am just making up a name for this colander-like apparatus) before getting down to actually making jam.We used small plums for this post, from a tree that is about 60 years old. They may be similar to European blue damson plums. Our variety is Early Golden Plums, I believe, although the name is lost to history. They ripen in early July locally. You could also use small tart cherries, such as Montmorency easily, or other small fruits with large stones.
Tools:
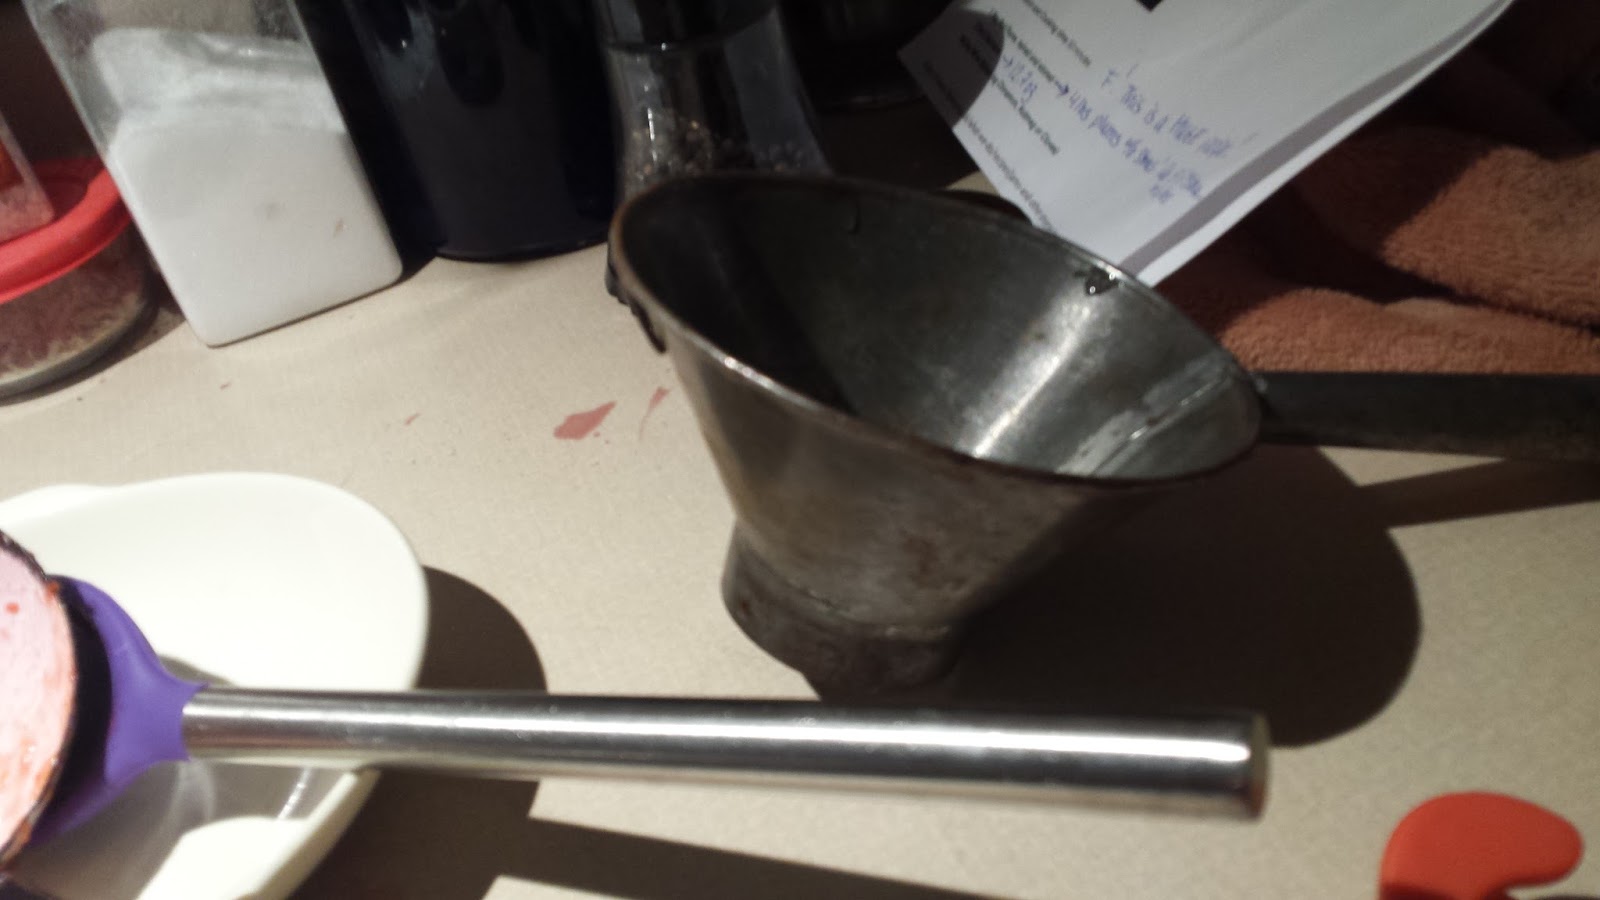
A colander sieve & wooden reamer with stand (important)
 |
| Stand, sieve colander, wooden reamer (filled with jam) |
A few large bowls
Stainless steel pot or Teflon-coated (make sure isn't coming off), large enough for boiling all ingredients
Flat-bottomed spatula, long stirring spoon
Ladle
 |
| Jar funnel |
Jar funnel for canning (important)
Lg. baking sheet
Jars & new lids if used already
Towels for covering jars, at least a couple medium bath towels, if using kitchen towels I double or triple the amount for top & bottom (discussed later)
Canning jar lifter (handy, but can use hot pad)
Ove-Glove high-heat wearable pot holder, or just regular pot holders
Dedicated clean wash cloth for washing jar rims only
Kitchen scale that goes up to at least 4lbs (small batch jam to start with)
A recipe you like! Don't just think about sweet jams, we also made a savory Asian Plum Sauce Jam that was amazing! If this is your first or hundredth time making jam a recipe that someone else has made that actually jelled is key. You can tinker with it but a starting point is crucial.
Pectin if using and ingredients for jam.
Pre-Jam Chores:
Wash your fruit and all instruments you will use in canning, including all the tools above. Alternatively you can run them in dishwasher while picking fruit & set to a HOT dry. Wash kitchen counters and stove top.
 |
| Ready to simmer when getting close to jam time! |
Wash & sterilize your canning jars (small for jams), even if brand new. If you have used your jar lids before, save them for freezer jam purposes. You need fresh lids to can. Set aside in a pan of water the lids and jar rings, these will be for simmering on stove top for when jam is ready to can.
Set your oven to between 250-275 degrees, and place a clean, washed, large cookie sheet in the middle of the oven. This will be for your sterilized jars. Place DRY jam jars into oven on the sheet, being careful that you have enough room to grab them (not too close to element) or for them to explode (if too hot). This will keep your jars hot enough that it will be LIKE a water-bath, and avoid that step.
Set up a dedicated canning area that your jars will cool on: must be lined with a bath towel or two kitchen towels on bottom - HOT jars placed here to cool & seal, then will be covered by two to three kitchen towels or bath towel on top to seal out drafts & cold air overnight (plan on not having this area disturbed).
Place all tools needed close at hand. Plan an activity to keep kids busy or if helping make sure you have something as backup. If you burn the jam while paying attention to something else, it is tragic & heartbreaking after all the work picking & sanitizing.
 |
| Jars in oven ready to fill when time! Oven at 260 degrees |
Let's Jam!
 |
| Juice, fruit, & stones ready to ream! |
Place all fruit and the amount of sugar called for into the stainless steel pot. Measure fruit in lbs, adding some extra to account for the stones (if small cherries or plums they are 1/3 to 1/2 stones, so add another lb or two of fruit to recipe. You can adjust sweetness later. Most recipes I use call for around 4lbs of fruit. You can also add more than one type of fruit together, just cut up all larger fruits to the same size as the small ones. One batch I made with small plums and large pluots.
Place pan on stove on medium to medium high. Bring to boil, check that skins slide off easily with your spoon. If they do, then remove pan & place into sink to begin removing skins and stones. Place sieve colander on stand over a large bowl. Ladle it 2/3 full of fruit/juice. Begin reaming with a circular motion, be mindful that when you slosh over edge stones end up in jam. Ream as necessary, adding in more fruit as you go. It is easier to ream & remove all flesh from stones when sieve is on the fuller side I found. You do not need to remove stones or skins, just add more until all juice & fruit has been reamed. Transfer the juice back into the pot, return to stove on medium & bring back to a boil. Add in lemon (tart citrus to kill botulism spores; read about on northwest edibles blog or internet or canning book), pectin if using, other stuff you are using. Bring to a boil, but NOT on high! Medium is high enough. Stir every few minutes, careful to touch bottom to pull off anything that is sticking. Do not adjust sugar yet.
 |
| After removing stones from skins, this is added back into jam on stove to cook |
Now you have a choice: do you want the skins back in the jam, or not? I like to add the skins, they have lots of flavor and sweetness. If you do, then you must let the skins cool a little, then untangle them from the stones in your sieve colander. It is not very complicated, takes very little time, but is hands-on and kinda messy. When/if you add them back to jam, you may want to use an immersion blender to grind them finer. This is why care must be used to not have stones in the jam, as some blenders are high-powered enough to cut pits into small chunks that are going to be in your jam unless you strain it again later (pain in the butt!). So take care. Maybe on your first-ever batch of jam or jelly, you don't use the skins. Who knows.
 |
| After immersion blending skins into jam |
Once you have come to either putting skins back in or not, you need to adjust the sugar in your jelly (without skin or chunks) or jam (with skin and/or chunks) after it has cooked for awhile & boiled away some of the water. Sugar and pectin help it jell quicker, but make sure it is a sweetness that you like. Real sugar is key to jelling and avoiding botulism. There are numerous books and posts about botulism and jam, so read some!
 |
| Hard to get pic, but notice bubbles along top of jar edge |
Ok so once you have cooked your jam awhile, say 30 minutes, test for done-ness by the way it sheets on an ice-cold spoon (from cup of ice & water). Again, there is a wealth of information about this that I am not going to cover here. Make sure your jar lids and rings are simmering.
Don wearable hot pads or get hot pads ready: Take a jar from the oven, top with canning funnel, and ladle jam into jar. If it is not boiling, it will be when it touches the jar edge. Look for the bubbles along jar edge! If it is not boiling around edges, then raise heat in oven, but mine did at 260 degrees. WIPE DOWN RIM with dedicated wet wash cloth (even if can see no smears of jam) before covering with a lid (grab them out between the tines of a fork), then finger-tight screw jar lid on. Turn upside-down for about 2-3 seconds while carring over to the cooling towel, then turn upright and listen for escaping air. It will be obvious when/if it ever happens. Place upright on towel, making sure not to touch any previous jars directly (but snuggled up close is great), and cover with towels to make sure no drafts. Lift & replace towels as necessary. When all done, make sure sides & top covered well. You can sometimes hear them POP when sealing. This is normal. Not hearing it is normal too.
 |
| All wrapped up ready to seal overnight |
Warn everyone not to peek or disturb, with threat of violence if necessary (just kidding.....sort of). Leave overnight. In am, the lids will be sealed: check by pushing center with finger, if any move/pop then place in fridge or freezer and use first. Label them with date and description. Unscrew rings to just barely tight or remove totally as that will ruin the seal over time.
Enjoy!!


